How To Attach Pusher Rail To Passap Duomatic 80
The Passap Duomatic (pinkie) and Duomatic 80 are almost identical when you need to tear them down, deep clean, and reassemble. The difference is in how their pusher rails are attached.
Here is how it’s done on the Duomatic 80. The pinkie and all other aspects of cleaning Duomatics, including the 80, is covered in my Passap Duomatic Deep Cleaning tutorial
 To begin, you need:
Passap metal chassis
Pusher retainer bar
4 square nuts
Spring
A pick tool to help install the spring
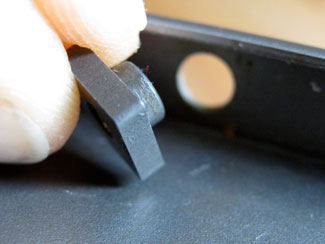 Locate the 4 square nuts and set them in place along the chassis.
 You may need to give them a push to seat.
On the one and only Pinkie we took apart, there were screws that went in these nuts.
On the three Duomatic 80’s we’ve cleaned, there have been no screws – only the square nuts.
Your mileage may vary.
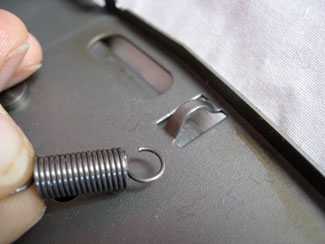 Find the spring and attach one end to the metal loop on the chassis.
 You can let the spring hang free while you set the pusher rail in place.
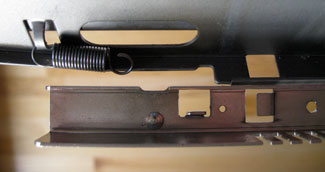 Holding the pusher rail underneath the front edge of the chassis, line up the matching square holes in the metal so the bent over tab on pusher rail can come up through the chassis.
In the photo I’m showing them side by side so you can better see the matching square holes of each.
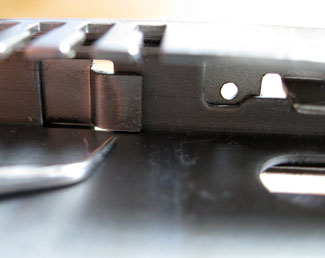 When the pusher rail tab is up through the chassis hole, slide the pusher rail towards the spring so it will semi-lock in place.
The tip of the pick tool is pointing to the pusher rail tab that is slid towards the spring.
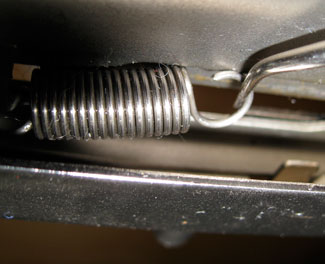 Using the pick tool, catch the end of the spring and pull towards the vertical post of the pusher rail.
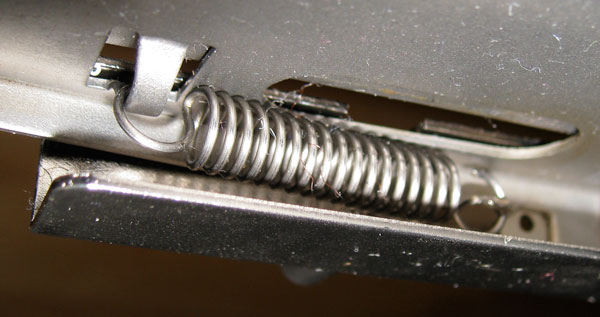
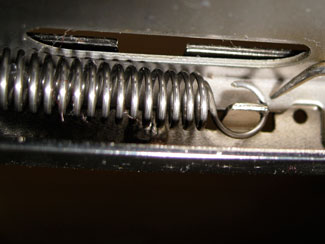 Set the spring over the post and remove the pick tool.
You are finished attaching the pusher retainer bar.
You can now continue assembling your machine with the Deep Cleaning Tutorial.
Related Posts
November 28, 2009


4 comments
Great photos of this. Thank you so much!
I am needing help with the connecting bolt that connects the front and back carriages, it seems to be bent as it sticks and I can’t get the bolt to push down so I can connect the two carriages anyone run into this? thanks.
How do I get a free download of Passap Duomatic 80 Manual. I tried under scribd but Internet Explorer interfered. Is there any other way
Thanks Victoria
Hello,
Thanks so much for your tutorials on cleaning the machine. I am in process of doing a deep clean on a Duo 80 I found on Craig’s List. Everything has gone well except for trying to re-attach the second upper rail on the back bed. It is now part way on and will not budge either forward or backwards. What’s a girl to do? Is there something I should look for?
Any information would be greatly appreciated.
Thanks, Julie